- click ‘read from file…’
- select the audio file(s) you need and click ‘open’
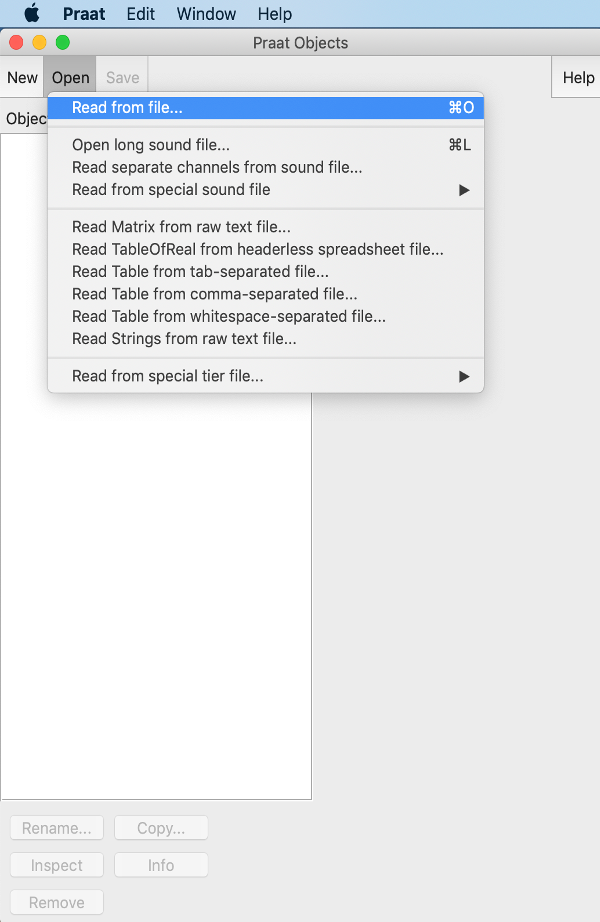
Figure 1

Figure 2
- select the audio you would like to investigate
- click ‘View & Edit’ and enter the acoustic analysis window
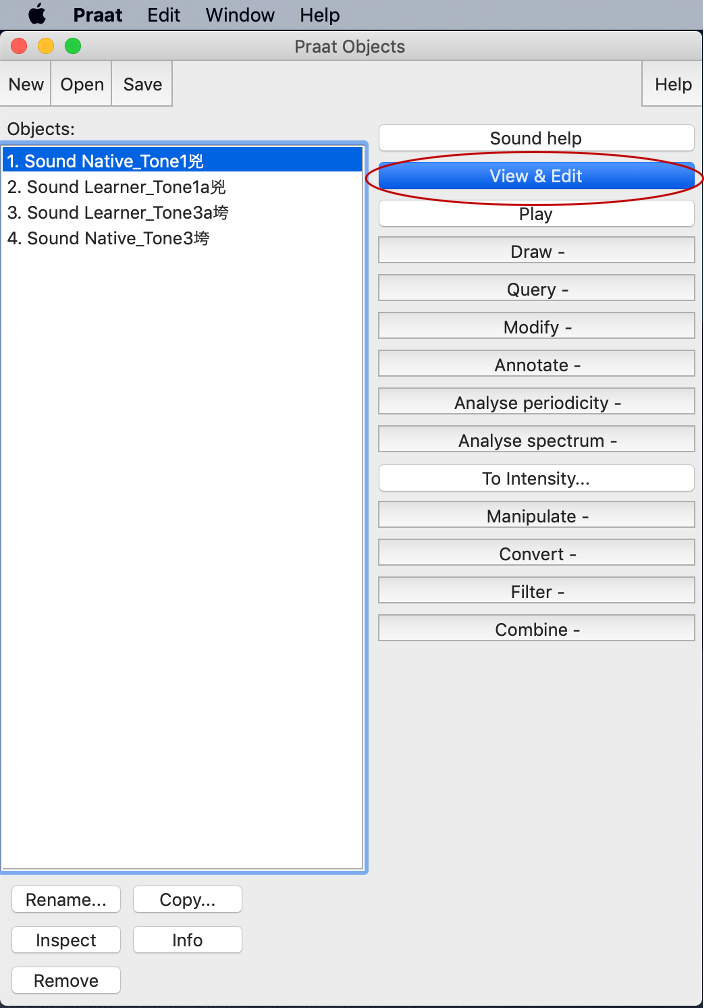
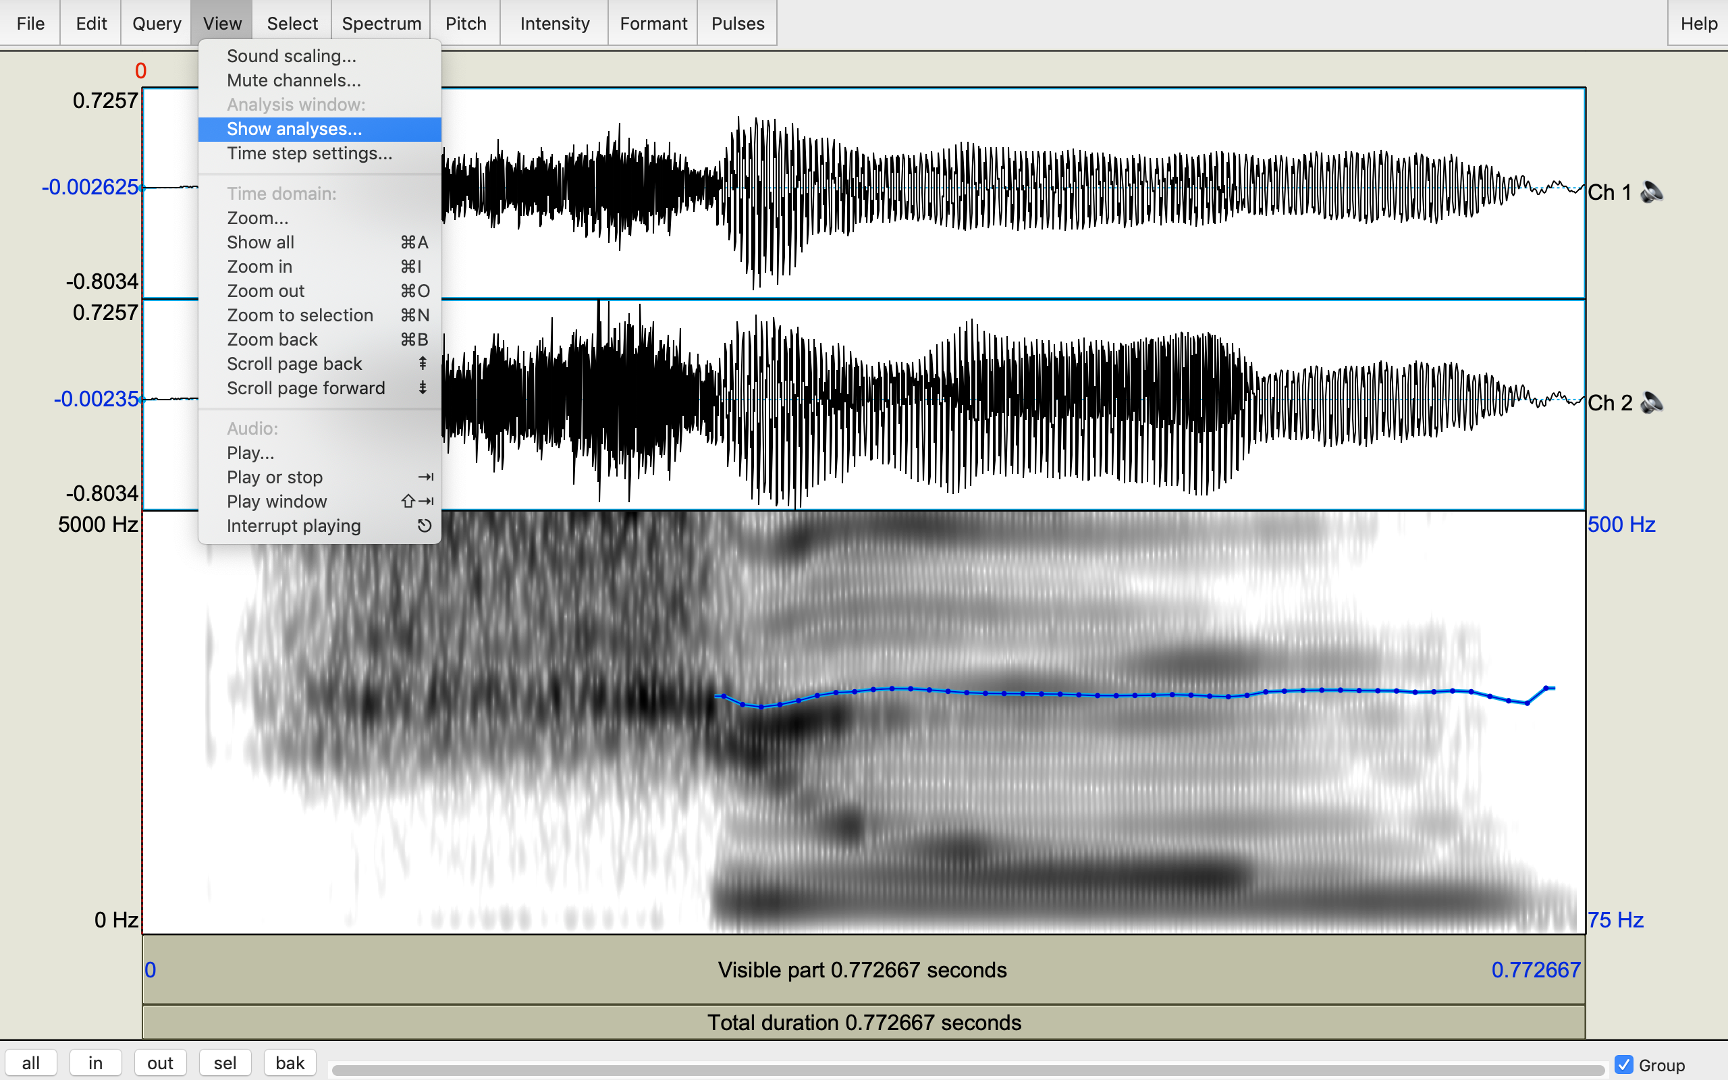
Figure 3
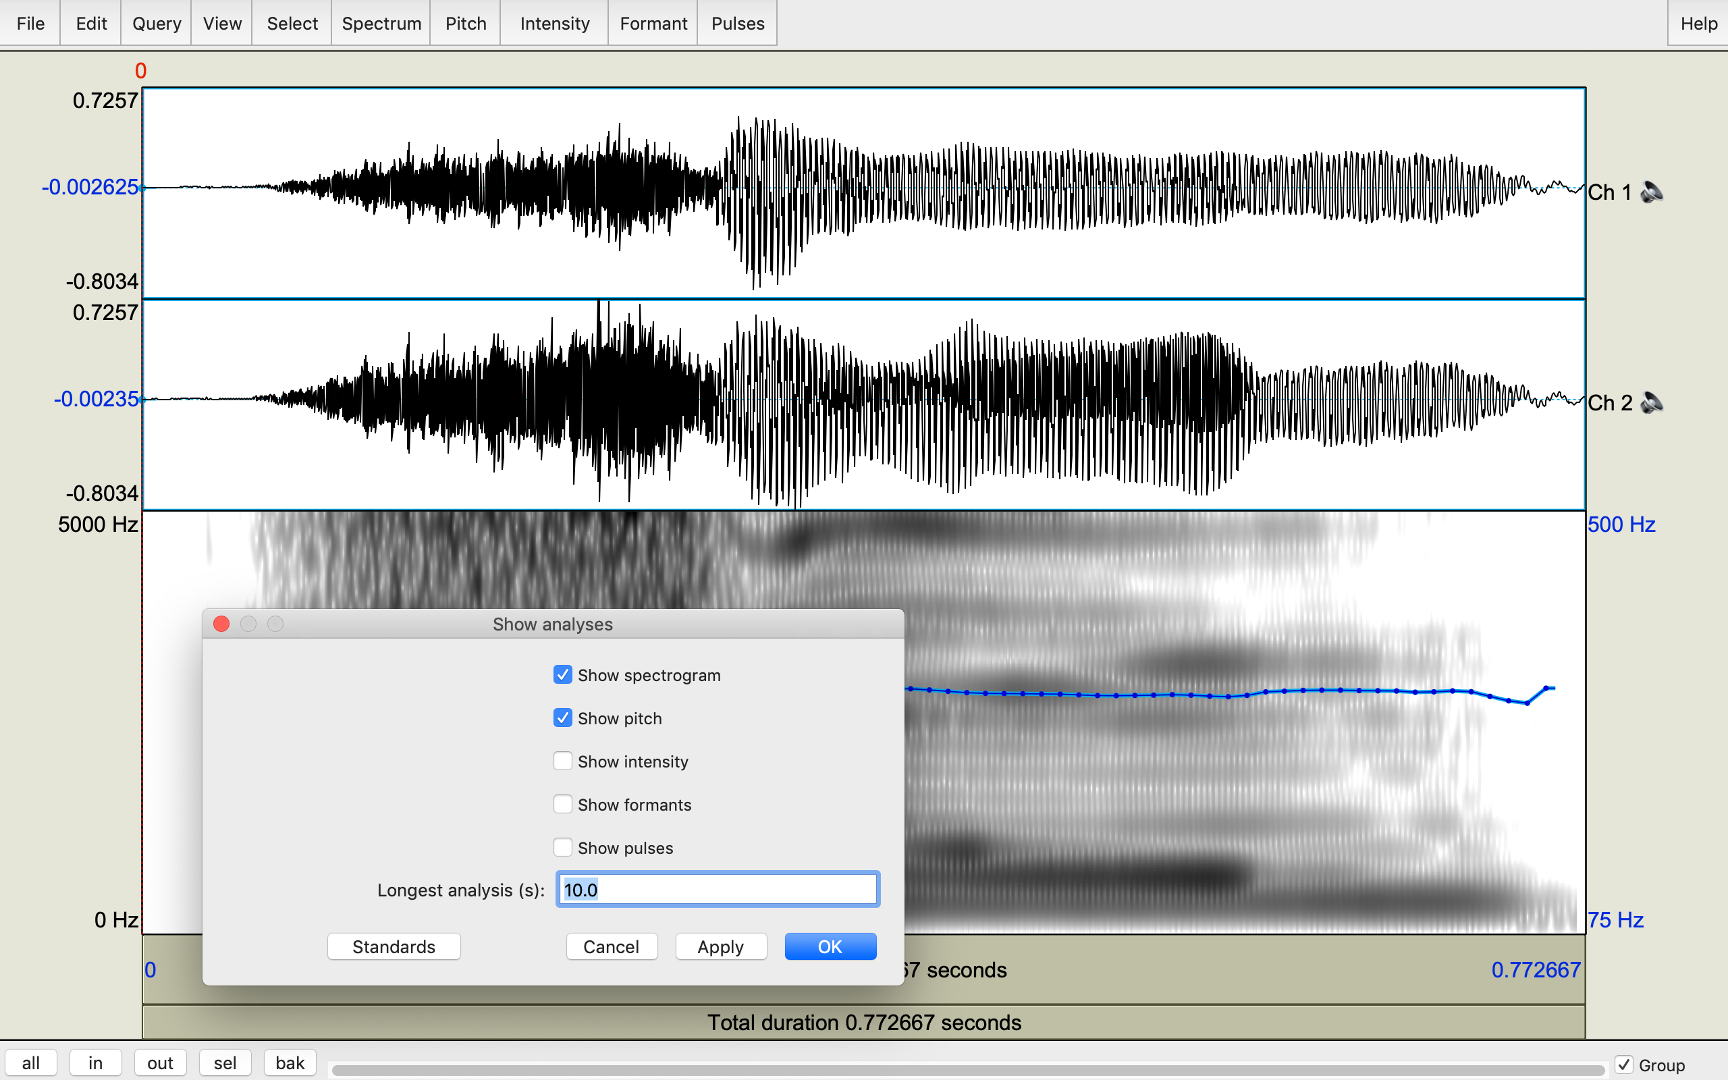
- click ‘view’ > ‘show analyses’ so you can choose the measurements you want to use
- for tone analyses, selecting ‘show pitch’ and ‘show spectrogram’ is sufficient enough
- click ‘ok’ and return to the sound
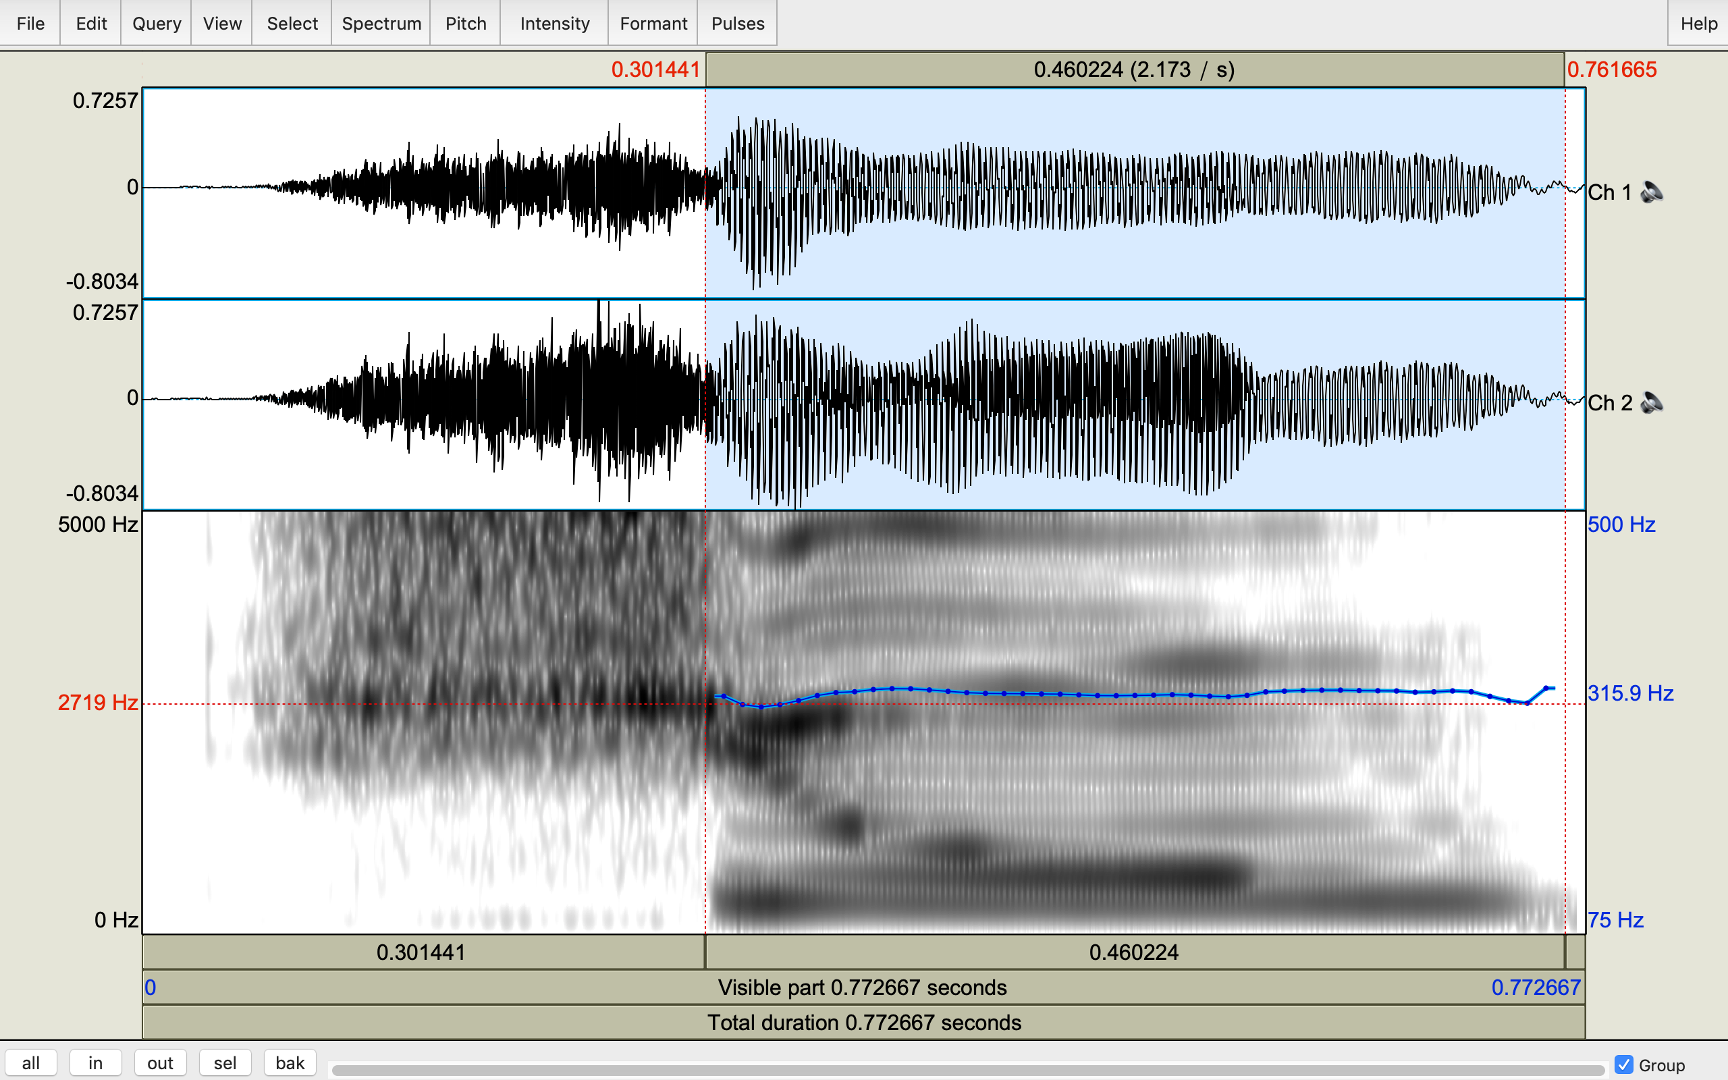
- the blue contour represents this speaker’s pronunciation of tone (if the blue line presents a leveled trend like in Figure4, it means the speaker’s pronunciation of tone is also leveled as Mandarin Tone 1 should be)
Figures 4 & 5
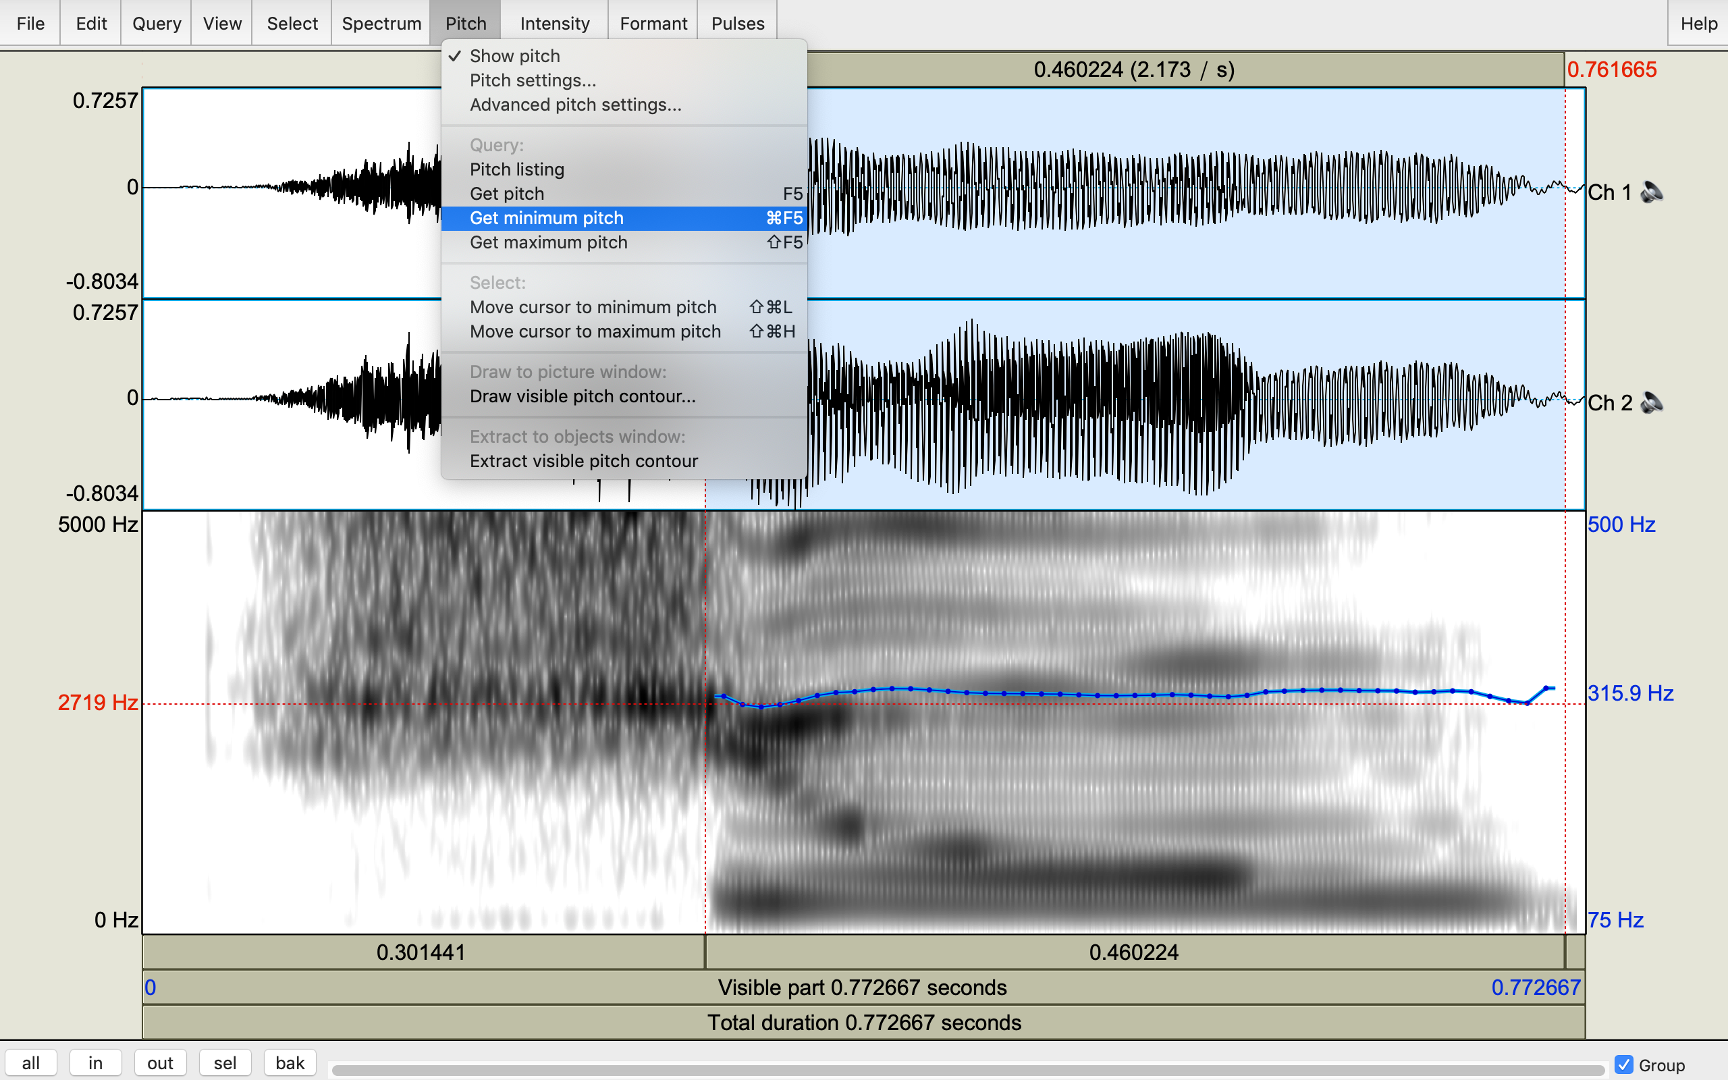
- drag your cursor and select the part with tone contour as shown in Figure 6, this part is the tone-bearing unit (vowel), we do not need to consider the other parts of the sound
- click ‘pitch’ > ‘get minimum pitch’
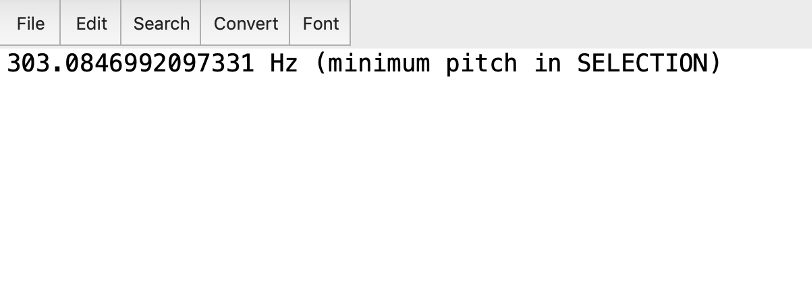
- we get the lowest value of the whole tone contour (303.08Hz)
- then click ‘pitch’ > ‘get maximum pitch’
- we get the highest value of the whole tone contour (321.97Hz)
- comparing the minimum and maximum pitch values, we can see that the difference is very minor, that means the contour is leveled, as a Tone 1 should be.


Figures 6-10
We can measure Tone 2 and Tone 4 by finding minimum and maximum pitch values like measuring Tone 1 because the tone contours are formed by relatively straight lines connecting highest and lowest points of tones. However, Mandarin Tone 3 contour is formed by a falling line and a rising line, connecting the starting point, dipping point, and the ending point.
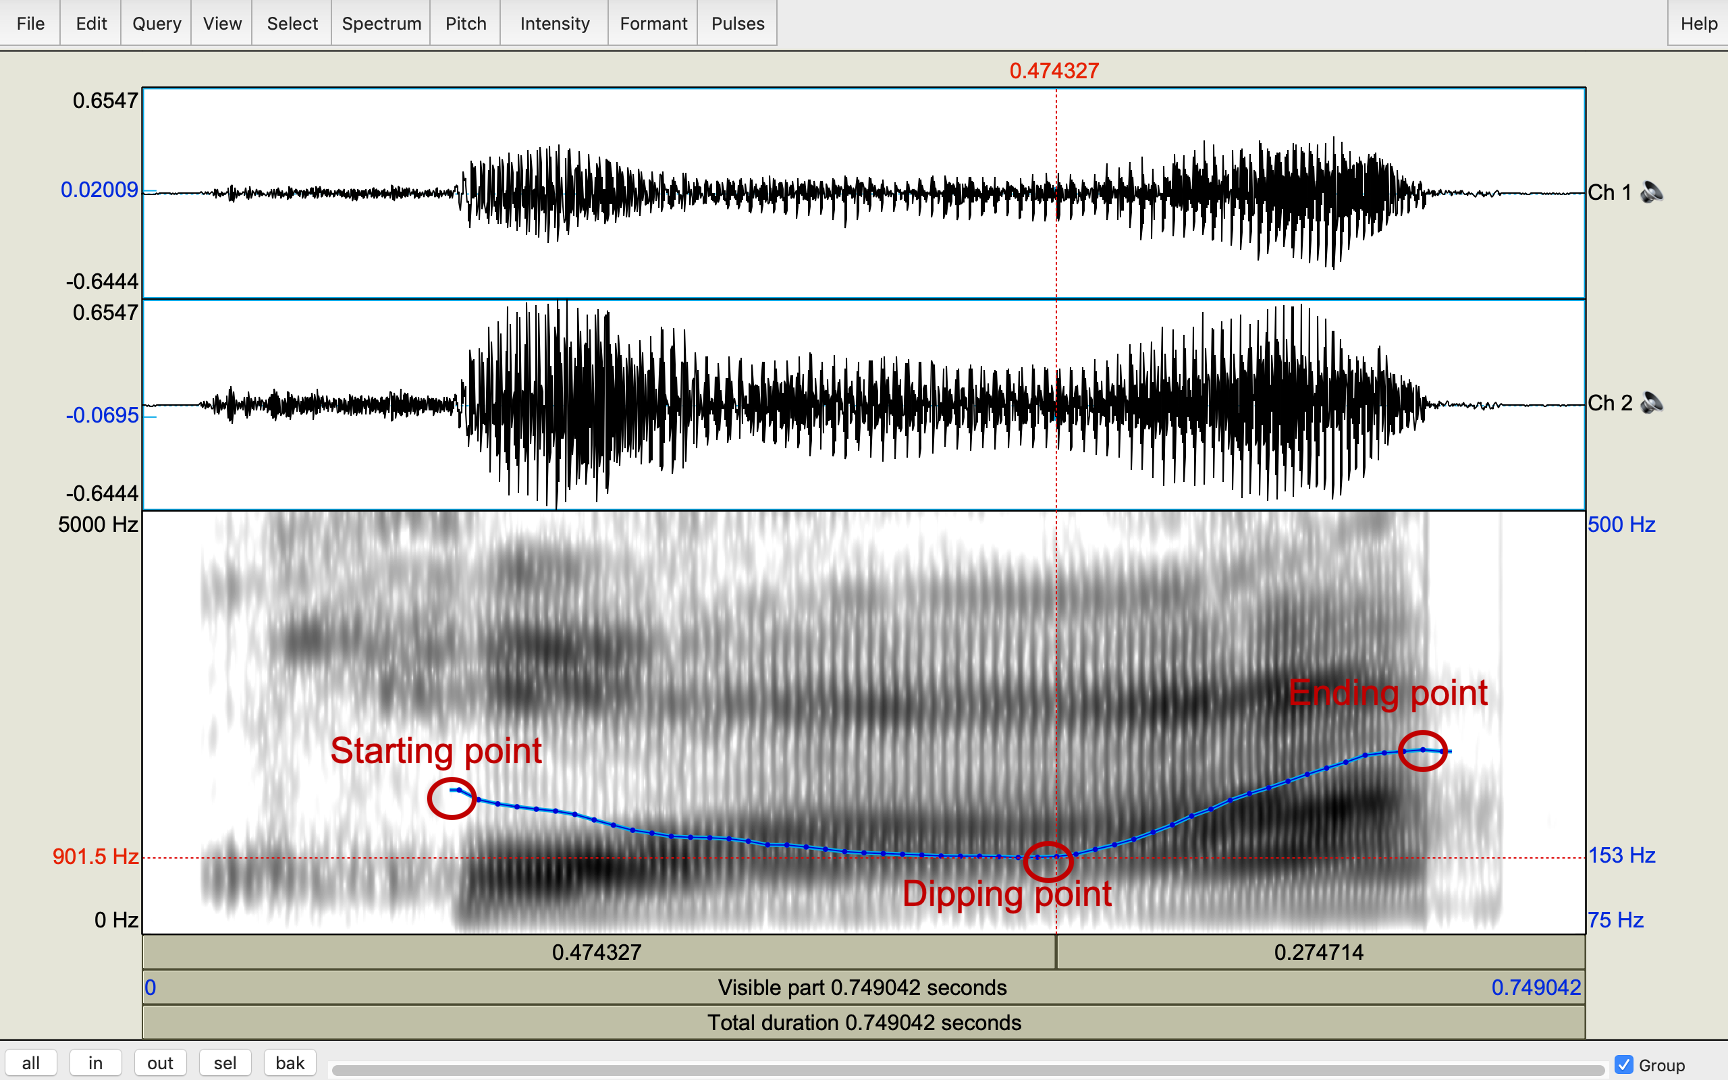 Figure 11
Therefore, we use a different method to measure Tone 3.
- use the cursor to click on the starting point of the whole tone contour
- click ‘pitch’ and ‘get pitch’
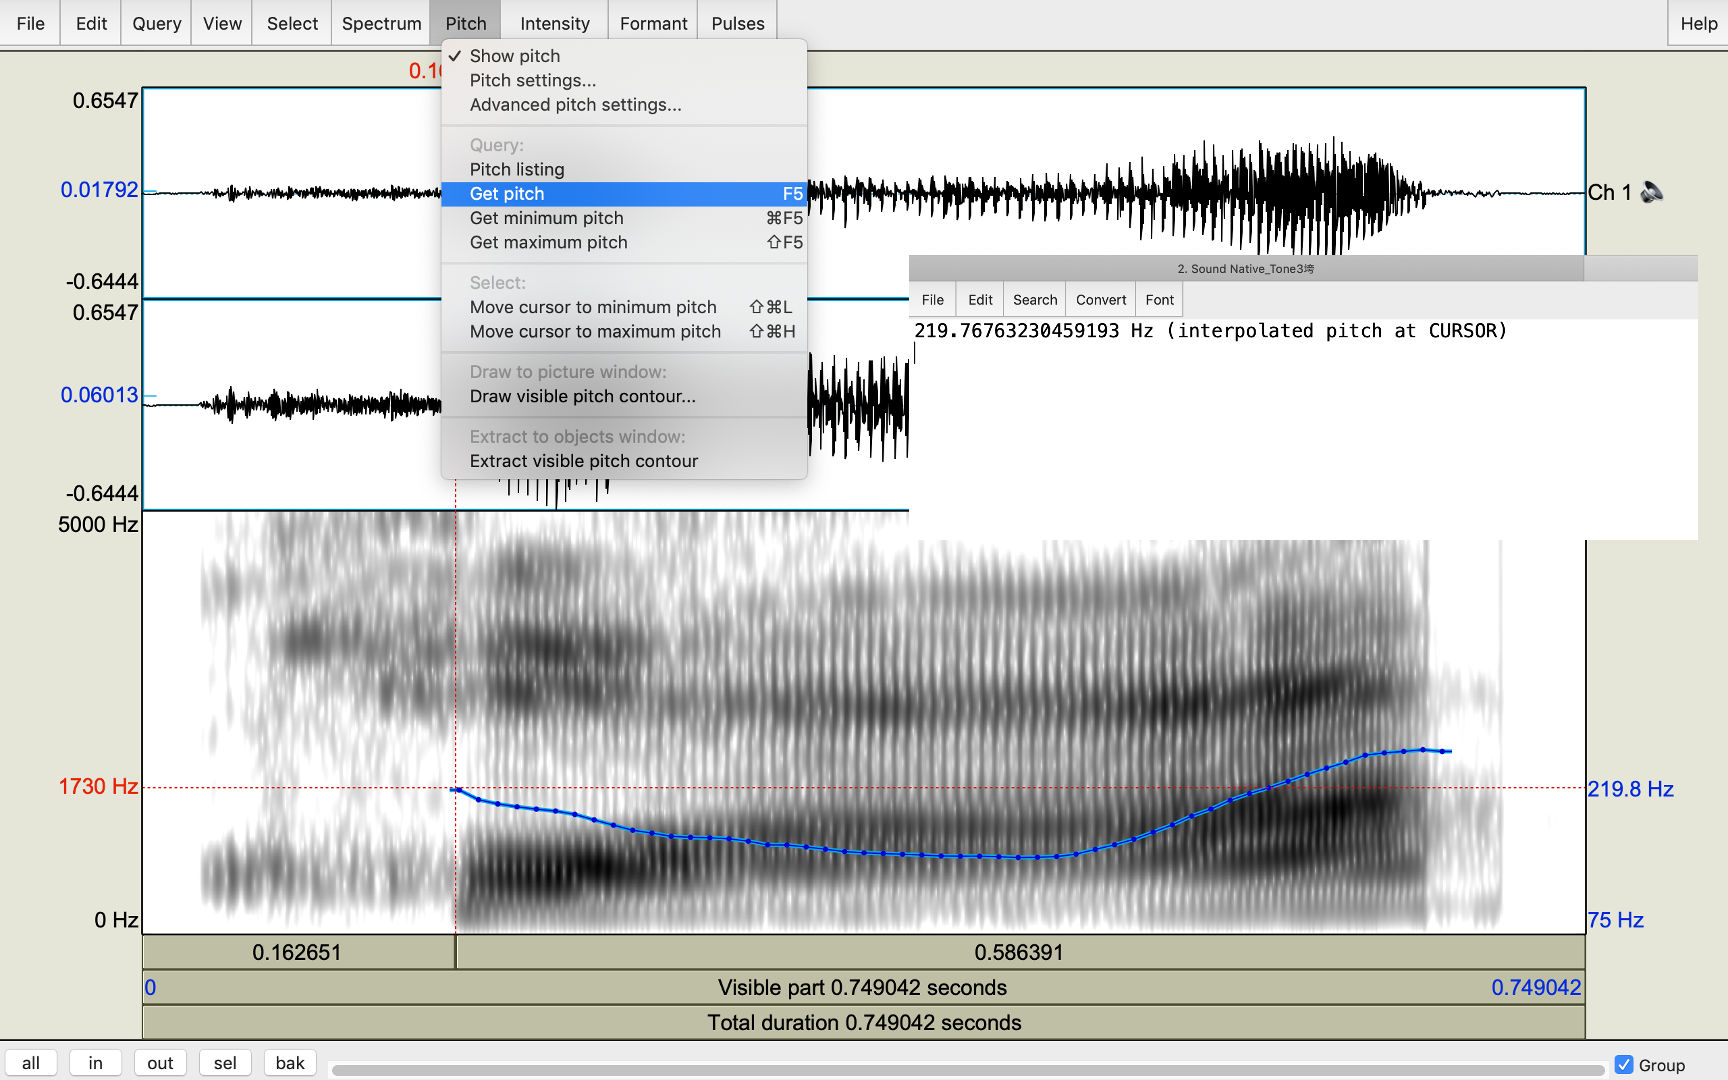
Figure 12
3. use the cursor to click on the dipping point of the whole tone contour
4. click ‘pitch’ and ‘get pitch’
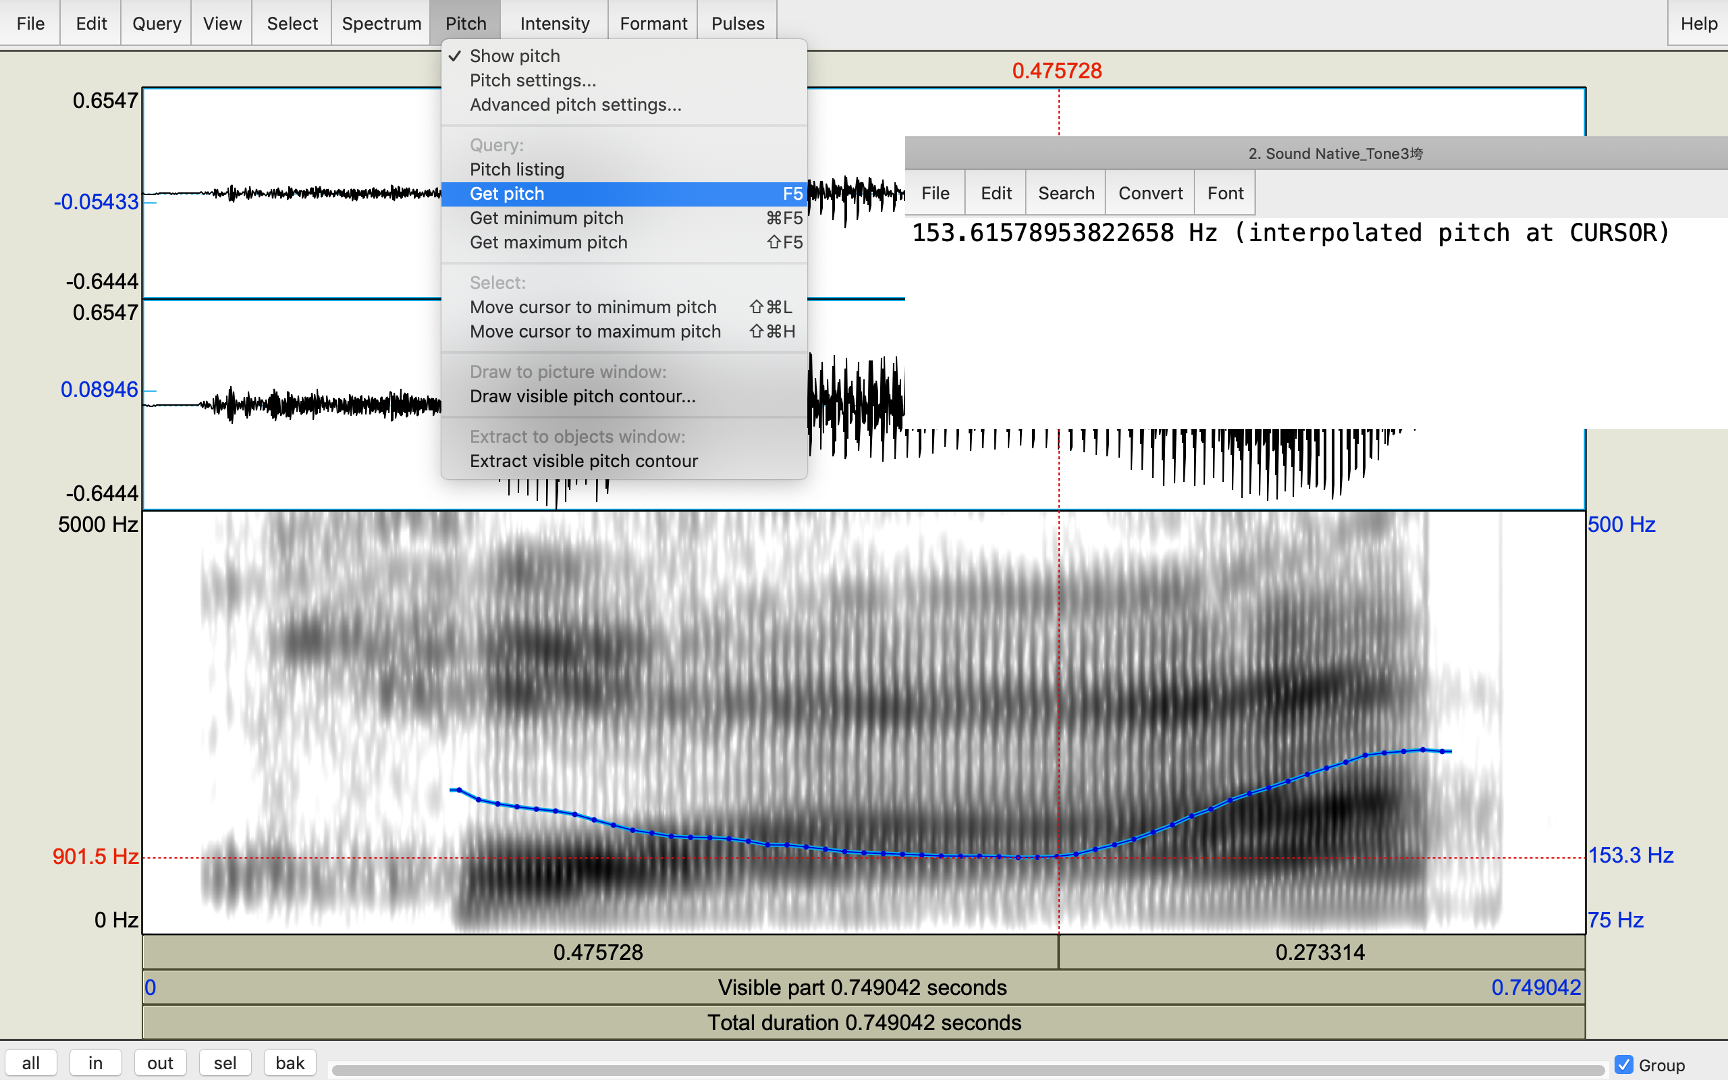
Figure 13
5. use the cursor to click on the ending point of the whole tone countour
6. click ‘pitch’ and ‘get pitch’
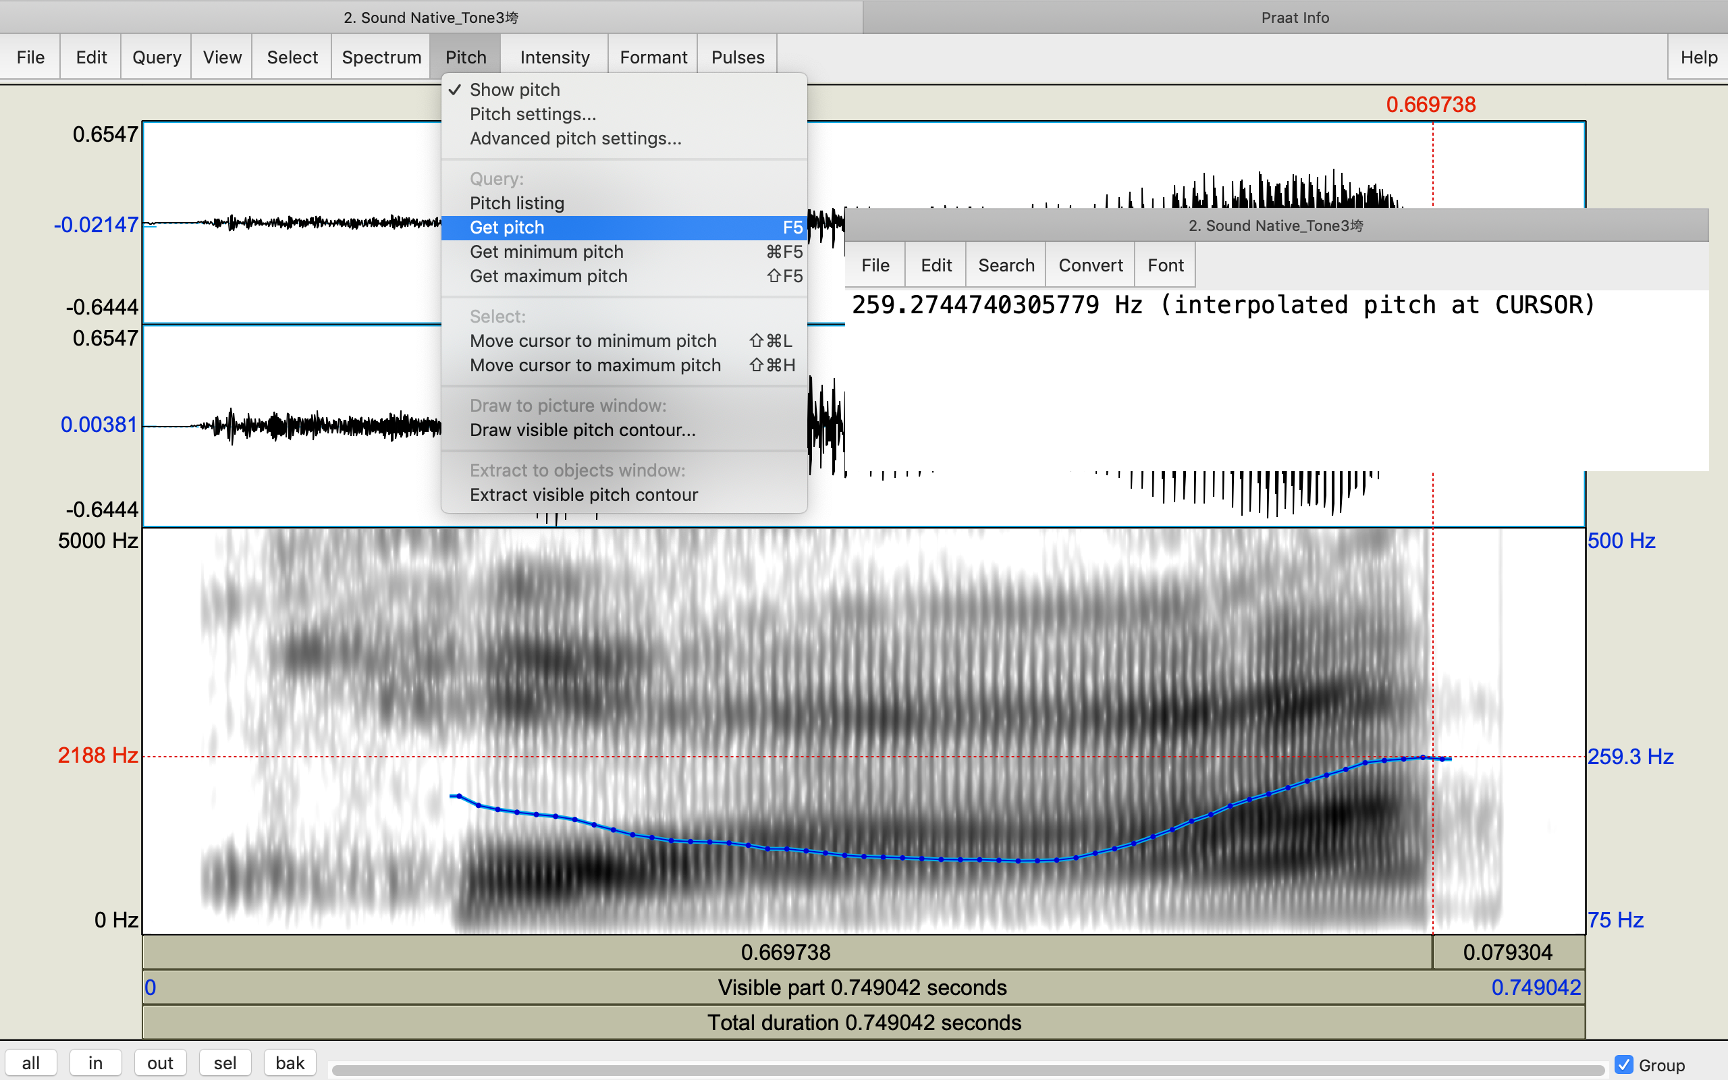
Figure 14
Hits: 69455