
You can go to website http://www.fon.hum.uva.nl/Praat/download_win.html and download the Praat to your computer. To start up the Praat program, just double-click this icon ![]() .
.
When you run the program, you will see the two windows below. As we mentioned before, the left window is the "Praat Objects" window. On the left-hand side you will see the list of your speech files. These can either be created from scratch or read from a file. Additionally, the right window is the "Praat Picture" window which is used to plot graphs. When you select a sound for further analysis and click button "View&Edit", the Editor Window will appear, where you will spend most of your time,
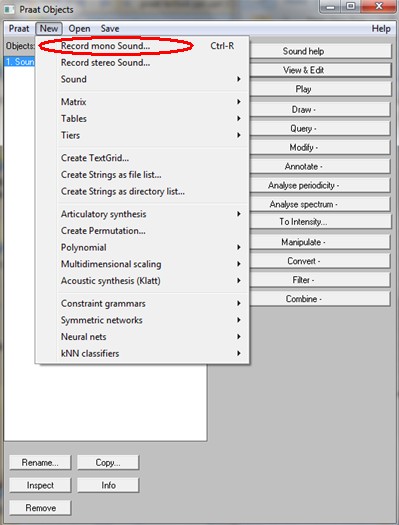
When you want to make recordings in Praat, the first thing you need to do is to connect a high-quality microphone to the MIC input of your computer, and then choose "New" on the top menu and select "Record mono record" , and the Sound Recorder window will appear.
Figure 1.16 The Sound Recorder window
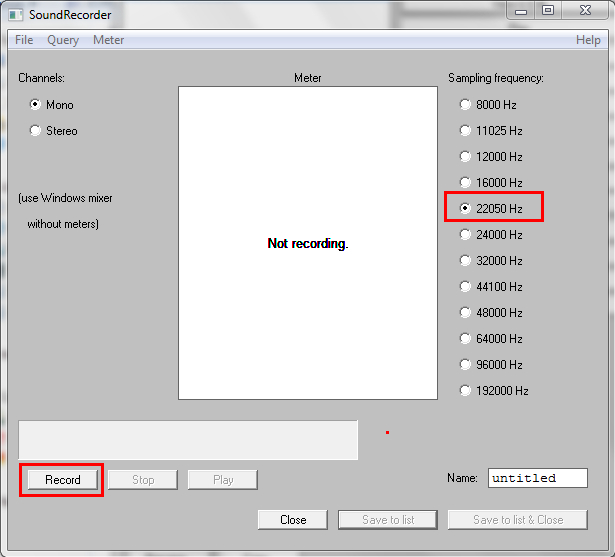
Set the sampling rate to 22,050Hz which is the most sufficient, and then take a deep breath and click the "Record" button to start your recording.
Figure 1.17
When you speak, the meter will show the input level with green bars. When you finish, click the "Stop" button. You can use the "play" button to hear what you have recorded and repeat steps 2 and 3 until you are satisfied with your recording.
Figure 1.18
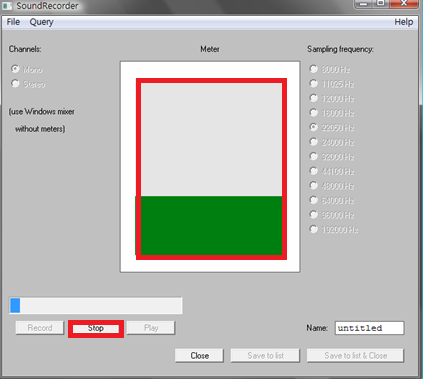
If the recording is to your satisfaction, you can add a name for the recording in the blank after "Name" and click on the "Save to list & Close" button. This will put your recording in the "object window".
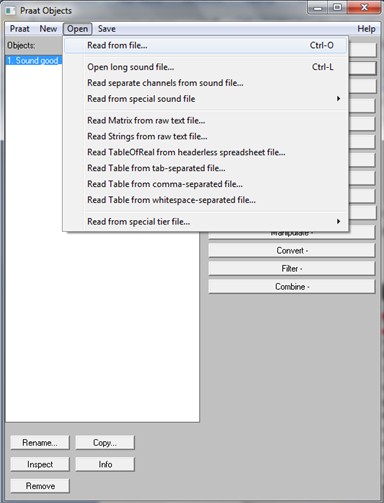
Apart from recording a new sound from a microphone, you could read an existing sound file from your disk. Click "Read from file" from the menu "Open", Praat will read the files from your computer.
Figure 1.19
Praat offers a lot functions to visualize, play and extract information from a sound object. You can start by selecting the speech object and then choosing "View&Edit" from the main menu on the right-hand side of the "Objects window". The new "Editor window", which has been introduced in detail in 1.2.3 b, will appear.
Figure 1.20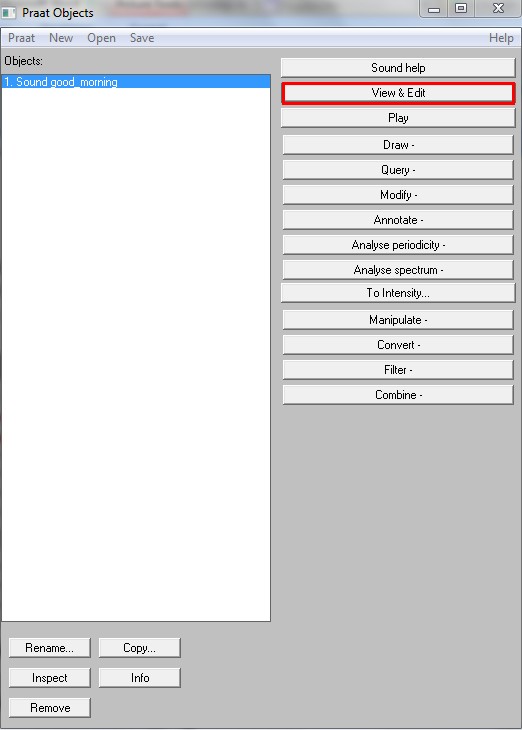
On the pull-down menu of Edit, you can find the following functions
- Cut: cut the selection to the clipboard.
- Copy selection: copy the selection to the clipboard.
- Paste: paste the clipboard contents to the cursor.
- Set selection to zero: set the selected samples to zero.
- Reverse selection: reverse the selected part of the sound.
Figure 1.21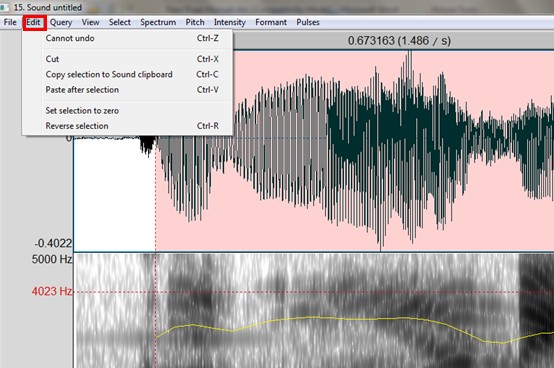
Remarks: Only when you select a part of the recording, all the functions in the pull-down menu can be activated, or they are grey and unavailable.
You can move the red dash line to change the scope of recording. If you want to cut, copy, and paste between the sounds, you can open more than one sound, and then select "cut", "copy", and "paste" between the sounds by moving a selected part of the sound to another location, and using "cut" and "paste" from the "Edit" menu.
Figure 1.22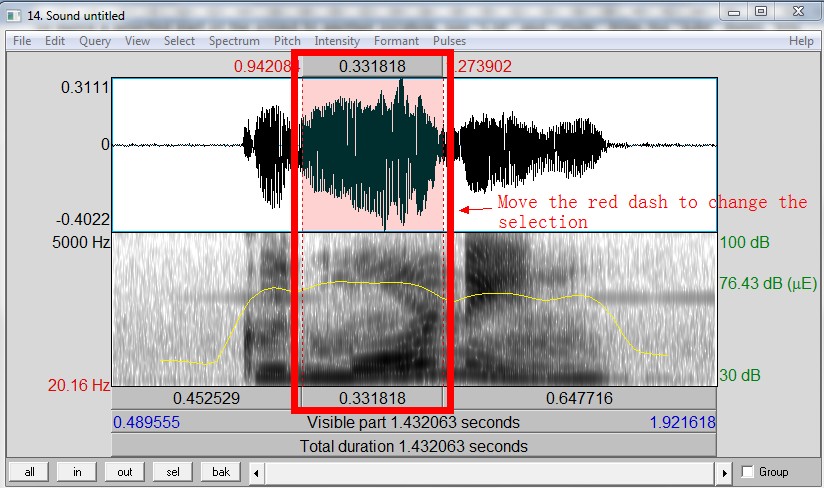
You can find the total duration of the recordings at the bottom and the duration of your selected part below the spectrum. To play the selected part of the sound, you only need to click on the rectangle below it.
Figure 1.23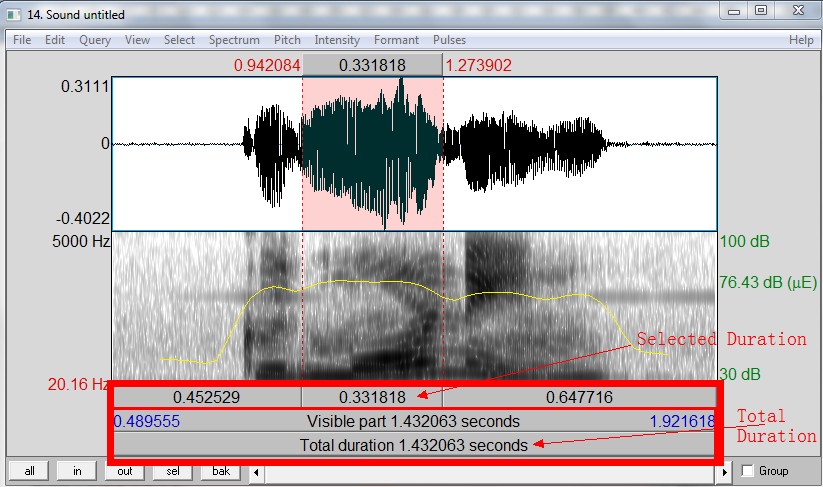
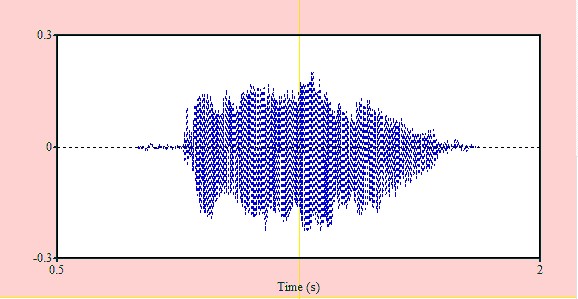
The easiest way to save a Praat picture is to take a screenshot of it. However, if you want to create and annotate publication quality graphs, more efforts are required. The standard way to print that spectrogram on paper, or to save it as an image file for inclusion in a report or presentation, is to transfer it to the Picture window with the "Draw" function from the Objects window.
You can draw a picture in Praat by the following steps:
- First, find the Picture window. If you accidentally closed it, you can just reopen Praat.
- Determine the physical size of the plot by changing the selection in the Praat "Picture window" (pink rectangular shape) before you draw the graph. Click in an area of the Praat "Picture window" (e.g., left upper corner) and draw the new shape while keeping the left-mouse button pressed.
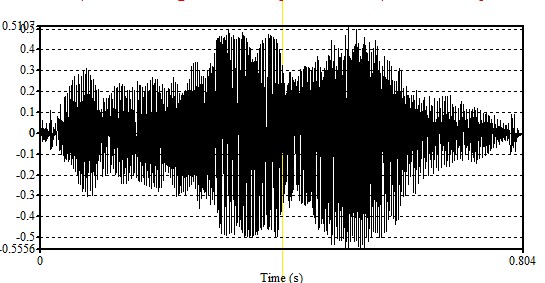
- Choose the given recording file on the left-hand side of Praat objects and click the "Draw" button. Set these parameters as you’d like. Figure 1.26 shows a drawing to the Praat Picture window.
Figure 1. 24
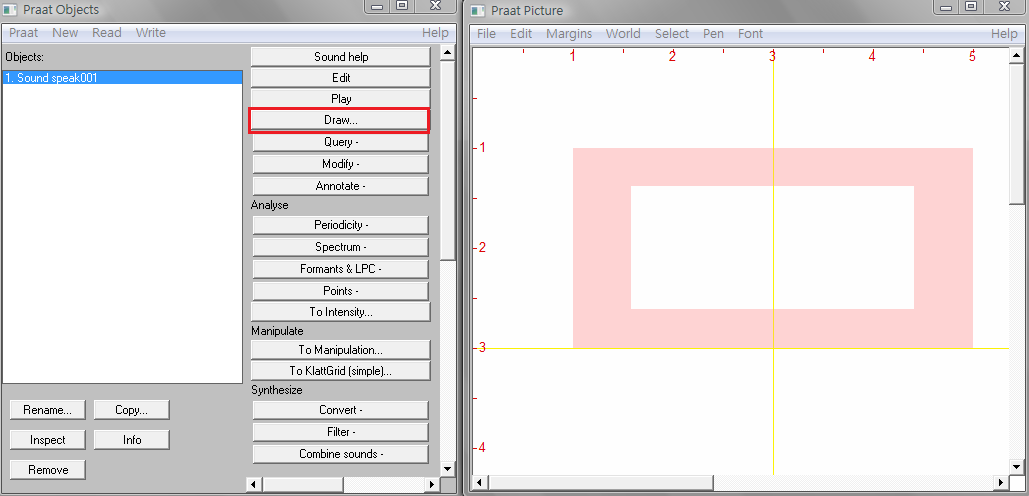
Figure 1. 25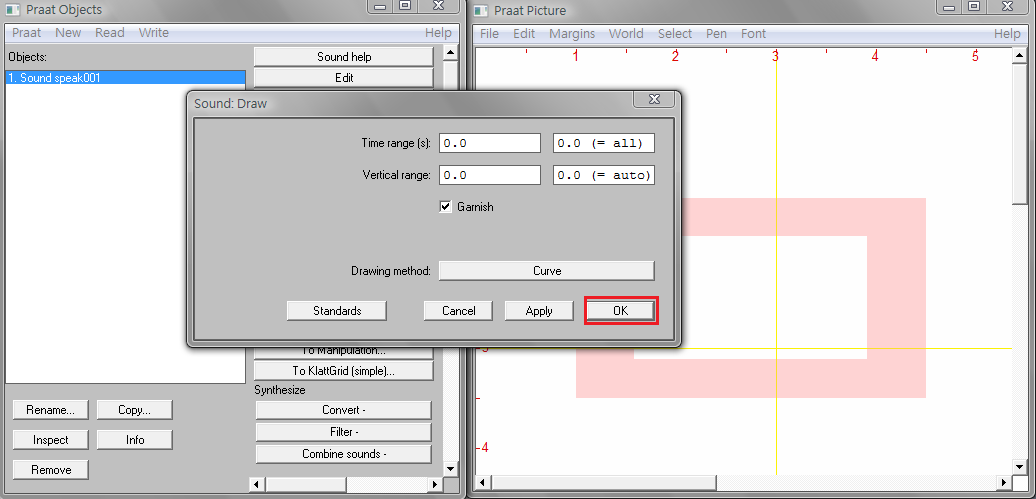
Figure 1.26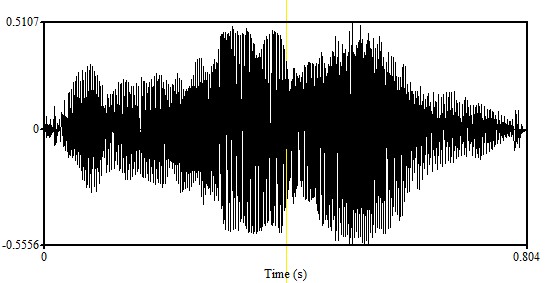
Now, we will introduce some basic skills about how to garnish your pictures using Margins, World, Pen, and Font in upper menu to further garnish your picture.
Margins: You can use "Margins" to add the texts and marks in your picture. Let’s use an example to illustrate the functions.
Figure 1.27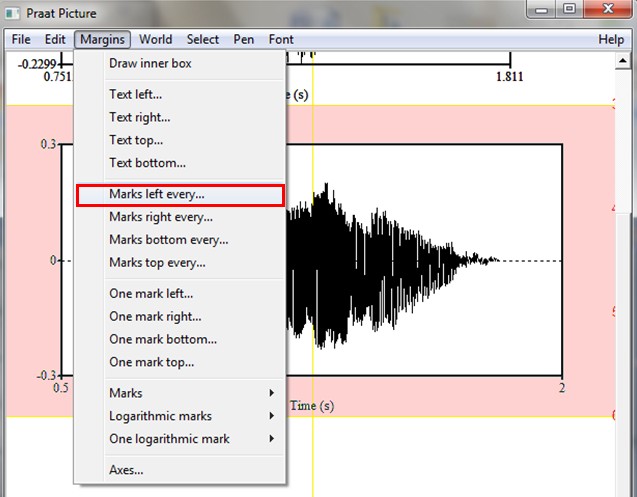
When you click "Marks left every", the following window appears.
Figure 1.28
In this window,
- Units is the basic unit for this particular scale; in this example it is 1.0
- Distance is the interval at which something is to happen (numbers, ticks, lines);
- Units and Distance work together, such that Distance is a fraction or multiple of Units; Distance is set to 0.1 for this example; note that Praat insists you enter 0 before numbers smaller than 0.
- Numbers writes the appropriate number at locations defined by Units and Distance; Numbers is not selected for now
- Draw ticks places tick marks at the defined locations
- Draw dotted lines draws a dashed line through the diagram at each defined location
Following these additions, the diagram looks like this:
Figure 1. 29
Similarly, you can add ticks and numbers at the bottom by opening the Margins menu and selecting Marks bottom every, the dialog opens:
Figure 1.30
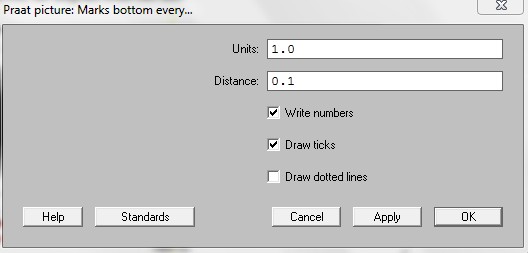
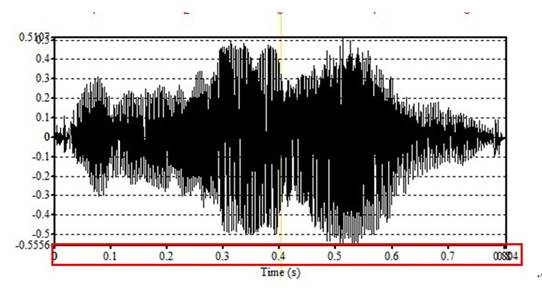
Then click OK, the diagram looks like Figure 1.31.
Figure 1.31
If you want to add titles at the top, you can use Text top command in the Margins menu.
Figure 1.32
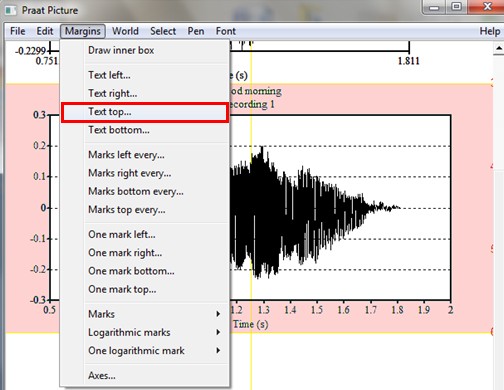
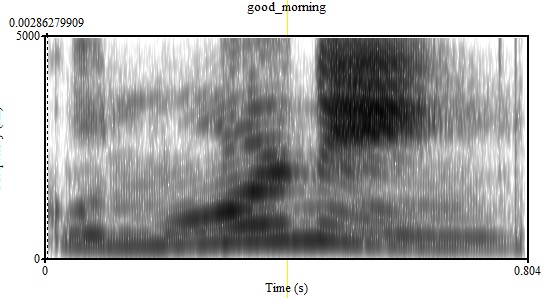
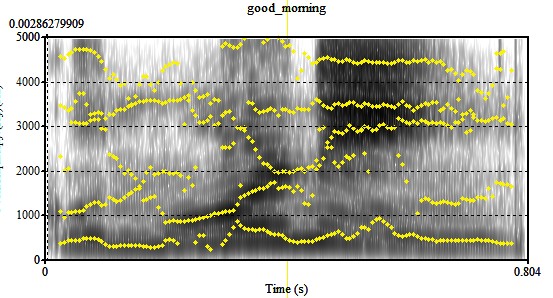
When you click Text top, the following window will pop up, and then put tick before "Far" and type in the text you want to put at the top, for example “good morning”, and then click "OK"
Figure 1.33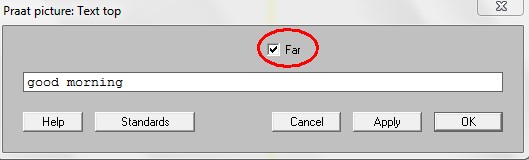
Figure 1.34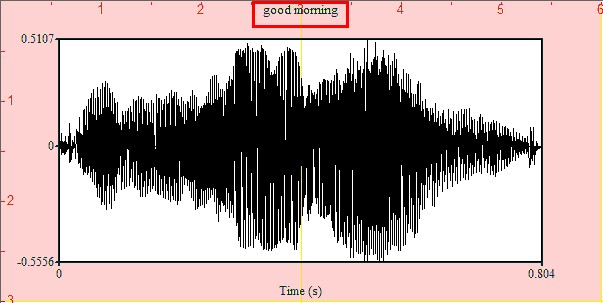
Remarks for 'Far': Two lines can be written at the top, one at the edge of the selected area and one just inside. You can decide which line you want to use by ticking the "Far" selection. When Far is ticked, you are going to place the text at the very edge of the drawing area. This is the first line. If you want to place the next line just inside, you can leave 'Far' unchecked and type the text you want, for example, we type "recording 1" in Figure 1.35.
Figure 1.35

After filling in the text for both lines, you can see two lines on the top of the pictures.
Figure 1.36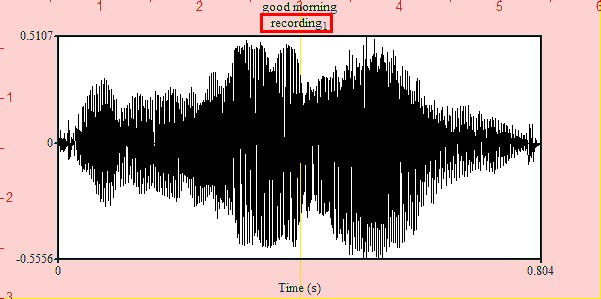
Pen: You can also use Pen to decide the line types and colors of your diagram. For example, I set the line as Dotted line and Blue. Then, the diagram will become like Figure 1.38.
Figure 1.37
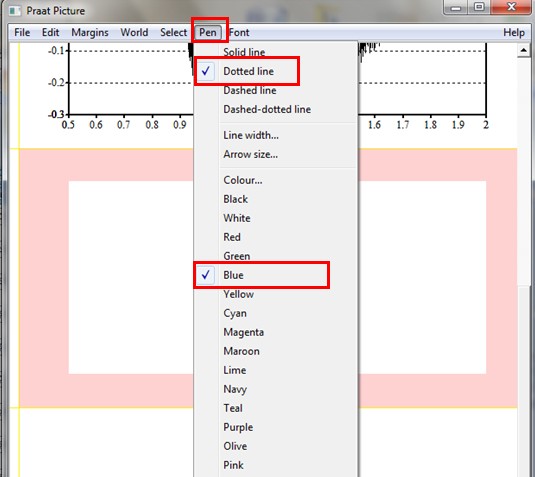
Figure 1.38
(This part is adapted from Wood’s beginners' guide to Praat (2005), which is available at http://person2.sol.lu.se/SidneyWood/Praate/printediting.html#Editing lines)
Besides drawing waveforms, Praat can also draw the spectrum, pitch contour, formant, intensity contour, etc.
Here, this manual will demonstrate how to draw a spectrum step by step in Praat.
- Open the Editor window.
- Determine the physical size of the plot by changing the selection in the "Praat picture" window (pink rectangular shape) before you draw the graph.
- Click in an area of the Praat "Picture window" (e.g., left upper corner) and and draw the new shape while keeping the left-mouse button depressed.
- Click the Spectrum and find "Paint visible spectrogram", then click it.
- When the Paint window pops up, just click OK, and the spectrum will be drawn.
Figure 1.39
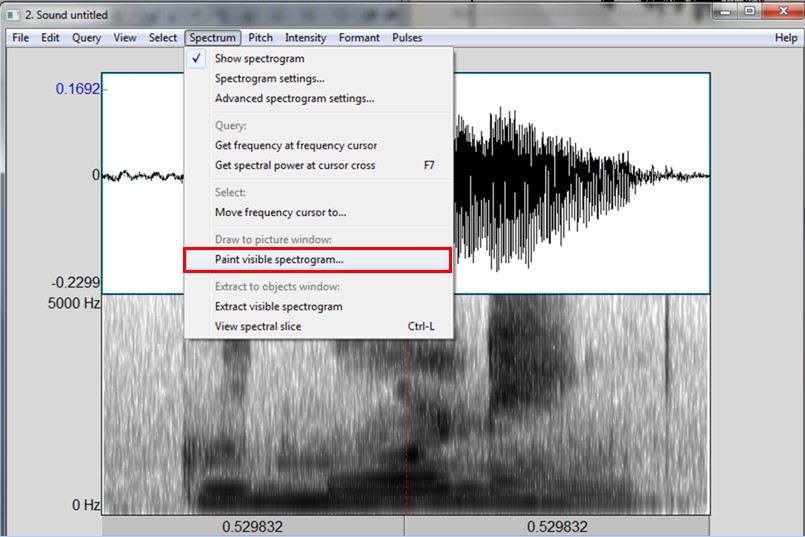
Figure 1.40
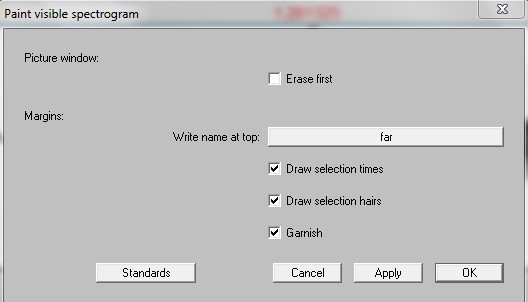
Figure 1. 41
Similarly, you can draw the formant contours by using the same steps. If you still select the same area in Picture window, the formants that are newly drawn will overlap with the old spectrum (Please see Figure 1. 43).
Figure 1. 42
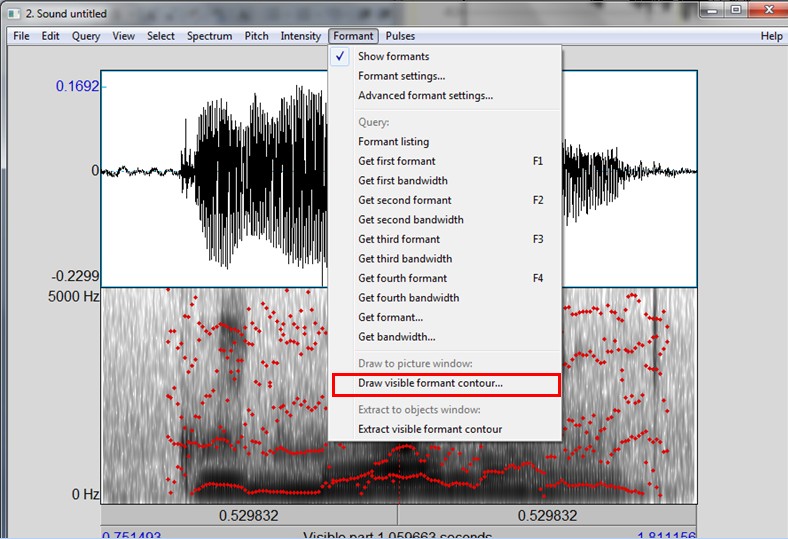
Figure 1.43
The color of the formant presentation can be adjusted in Pen.
Figure 1.44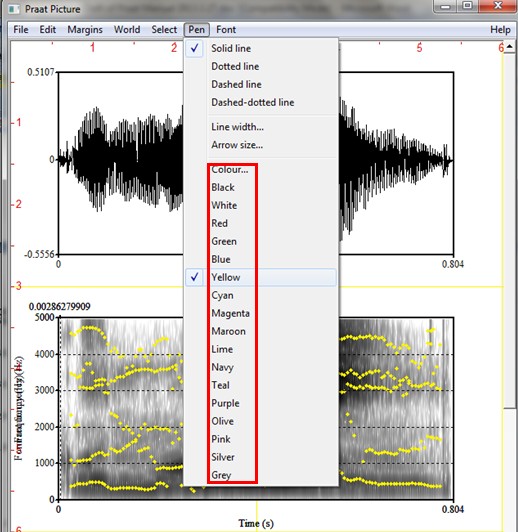
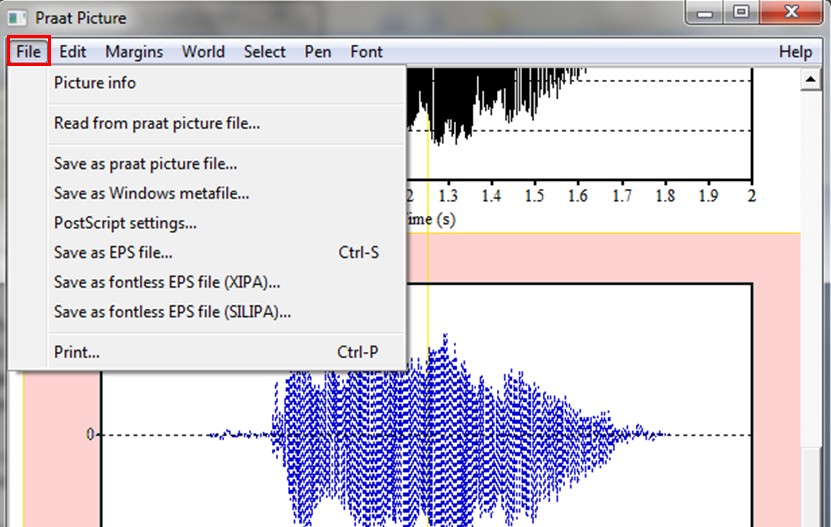
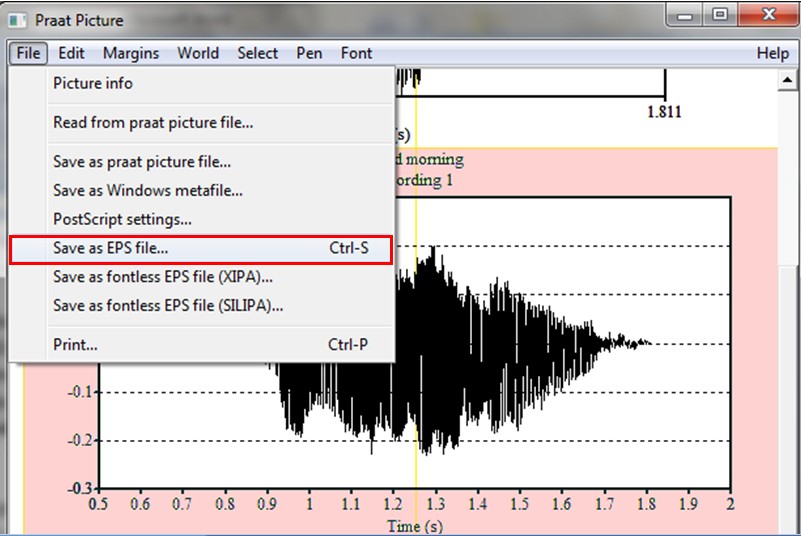
Praat can save what you currently select, so make sure you have selected what you want. Before we save our diagram we should know how many formats we can use . When you click "File", you can see the following three formats:
- Save as praat picture file
- Save as Windows metafile
- Save as EPS file
Figure 1.45
- Praat picture file: This is a file format that is exclusive to Praat and cannot be opened or edited by any other program; the entire contents of the drawing board are saved as one image; the images are saved as a ".prapic" file. You will notice that this is the only image format that Praat can open again (via "Read from Praat picture file"), so you can use this format when you wish to continue working on your page in the Picture window on a future occasion.
- Windows meta file: The enhanced metafile is a standard Windows file format: use it if you wish to open your work in some other Windows program such as an image editor like Photoshop or word processor; only the selected area is seen in the saved image, so make sure you select what you want before saving; the images are saved as ".emf" file. When you double click the file, the file will be opened in your default image presentation software.
- EPS file: This is a postscript file, for computers that are set up to use Postscript for image editing and for printing; only the selected area is seen in the saved image, so make sure you select what you want before saving; the images are saved as .eps
(This part is adapted from Sidney Wood (2004) "Praat for beginners" that is available at http://person2.sol.lu.se/SidneyWood/praate/printing01.html)
In this manual, we only demonstrate how to save the picture files as .eps, you can later convert it to "Windows meta file" or other formats that suit your needs.
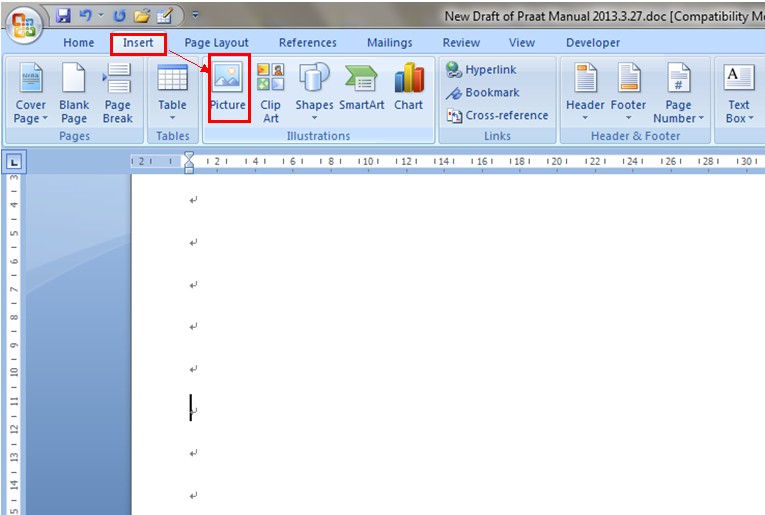
You can insert an "eps" file into your document from the insert pull-down menu at the top of the Microsoft Word window. Then click on the "Insert Picture" dialog box. Choose "Encapsulated PostScript (*.eps)" for "Files of type" Navigate to the directory that contains the EPS file, and double-click on the filename of the EPS file that you want to import.
Now let’s save the picture file as an EPS file.
First, select the picture you want to save and click Save as EPS file, and save the file on desktop as "Praat_picture 1".
Figure 1.46
Second, open your word file, click insert → Picture → Choose "Encapsulated PostScript (*.eps)" for "Files of type." → Navigate to the directory that contains the EPS file, and double-click on the filename of the EPS file that you want to import.
Figure 1.47
Then the picture made in Praat will be inserted in your word file as shown below.
Figure 1.48
Hits: 7700